Manage Webhooks via the Console.
Webhook Configuration
Note: The following screens relate to a merchant but the steps are identical for partner users.
To access the Webhook configuration:
- Click Webhooks from the left-side menu.
- Or view the Recent Webhooks area of the dashboard.
To add a new Webhooks:
- Click Add Webhook.
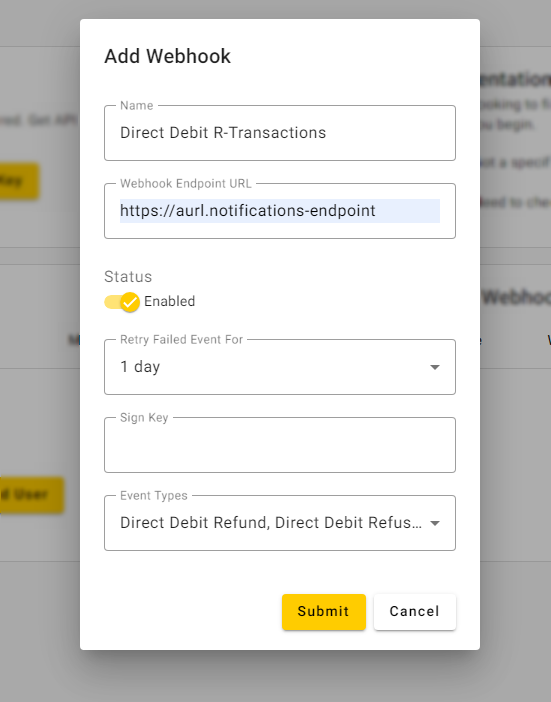
- Specify:
- The
Nameof the Webhook notification. - The
Webhook Endpoint URLof the Endpoint you configured. - The Webhook
Statusis set to Enabled by default (if set to Disabled then no notifications are generated). - The
Retry Failed Eventsperiod (determines for how many days failed notifications will be retried. Retries are automatically generated every 30 minutes). In the screen below the setting is1 dayso retries will be made every 30 minutes for 24 hours (or until a retry is successful). Sign Keyis the secret key that the application uses to sign the notification JSON body. The signature is sent in the request HTTP ‘x-signature’ header. If you leave this field blank the application will automatically generate a key.- The
Event Typesdrop-down allows you to configure what event(s) will trigger the notification to the Webhooks Endpoint URL. You may define 1-n events as required.
- The
- Click Submit.
Tip: Webhooks configured at the Partner level will be triggered for all Merchants configured under that Partner.