Overview
The following image outlines the sequence of API call required to create a consent and use it to retrieve account details (in the SELF-HOSTED-CALLBACK integration):
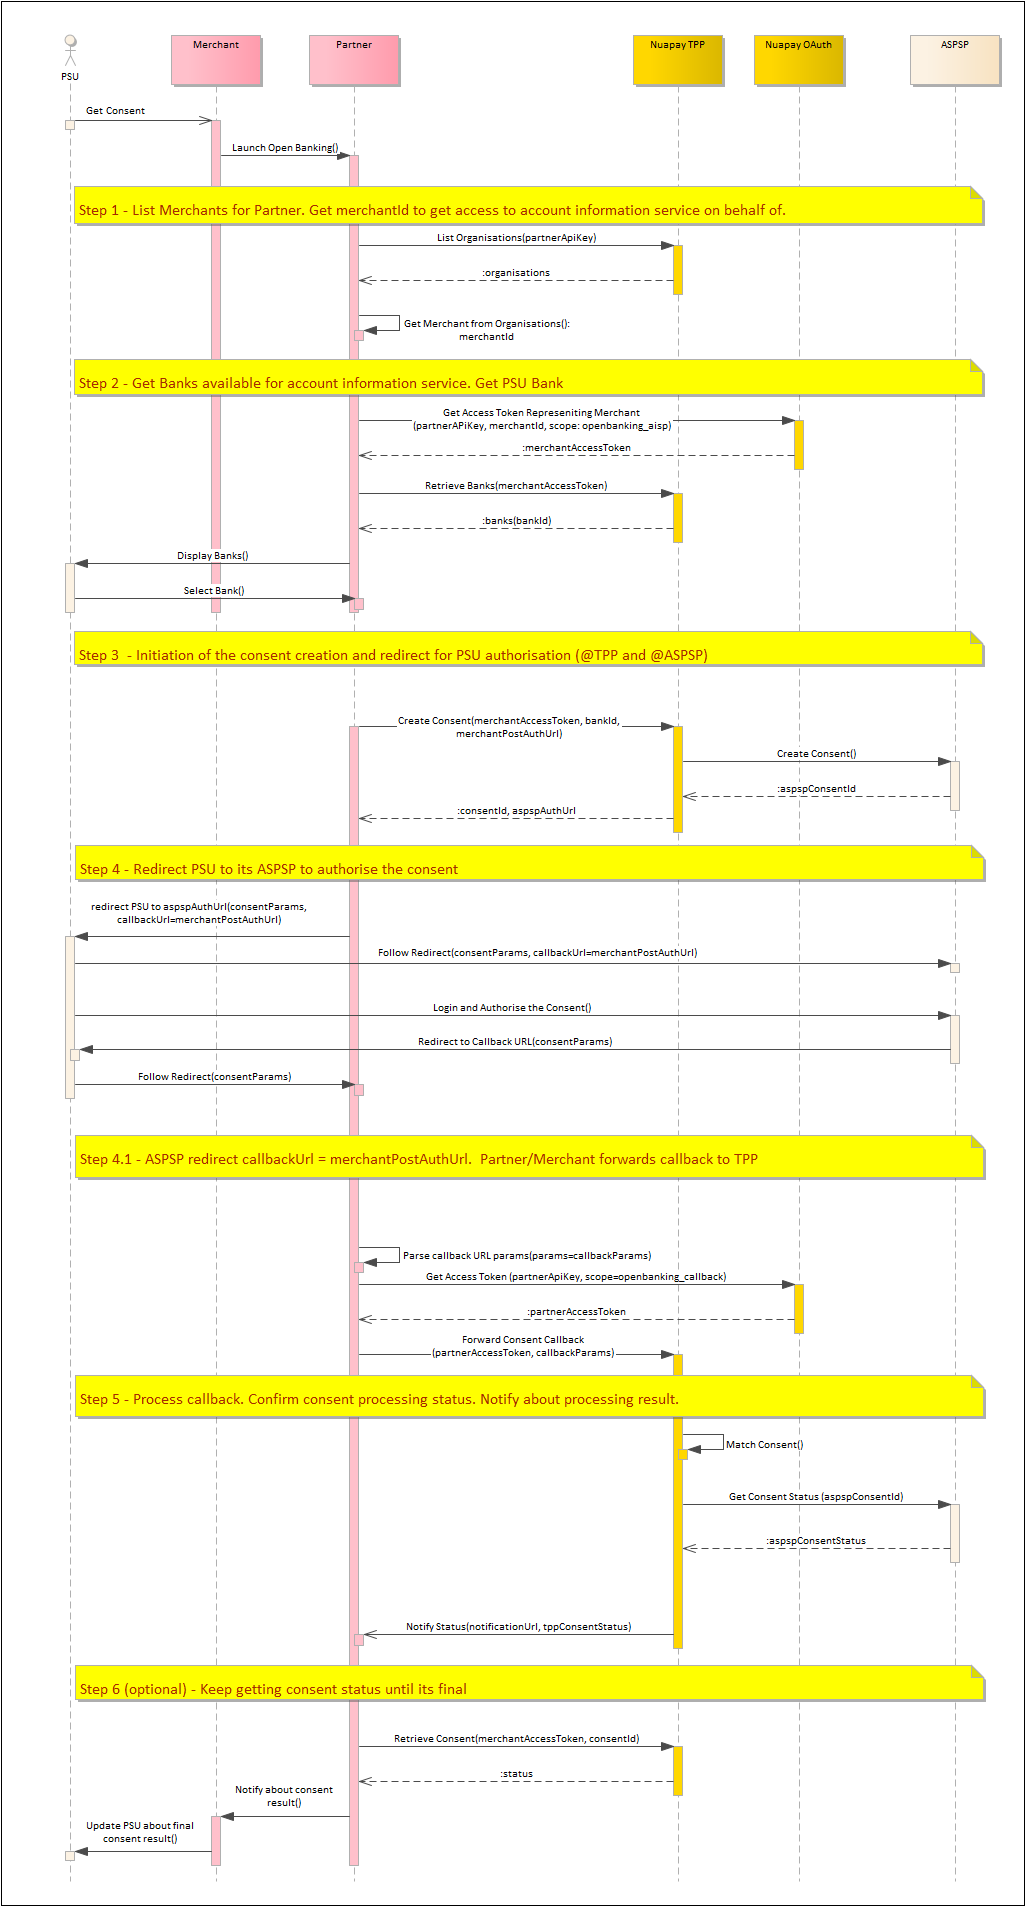
All the endpoints referenced in the image above are described in the Account Information API section.
- Partner users will need to first retrieve the required
merchantId. The customer of this merchant is the subject of the consent request being made. - Retrieve the bank list to be displayed to the end user. The user will select the required bank.
- With a selected bank, create the Consent request and return the redirect URL to the user.
- The user follows the redirect and provides authorisation for the access request at the selected ASPSP; following this the user is redirected to the
postAuthURL. The callback parameters are passed to the Nuapay TPP in the Forward Consent Callback endpoint. - The TPP parses the consent and retrieves the consent status from the ASPSP.
- If required, the consent status request can be retried until an
ACTIVEstatus is returned.
With an ACTIVE consent, it is then possible to initiate an account access request.
Merchant Post-Auth URL Handling
The merchant merchantPostAuthUrl is sent as follows:
The payload of this request that you need to process includes:
Headers e.g. Content-Type: application/x-www-form-urlencoded
Body e.g. endToEndIdentification=d8e17bf1f3244e5f96a869f9661a2a6&paymentId=gabxl3knbl
Please note that the ‘paymentId’ allows you to look up the payment associated with this callback.
User Interface Guidelines
Note that:
- In SELF_HOSTED mode you have control over the User Interface design of your application.
- It is important that your design incorporates links to the Nuapay “Terms of Service” and “About” pages.
- These pages provide useful information to your PSUs in regard to Nuapay and our license details, as issued by the Financial Conduct Authority (in the UK) and by the ACPR (in the EU).
Please use the following links:
| Terms of Service | https://www.nuapay.com/en/openbanking-terms-of-service/ |
| About | https://www.nuapay.com/en/openbanking-information/ |
Bank Families
In STET and Berlin Group:
- Some ASPSPs are individually configured with a URL and token endpoint per regional bank.
- For example Credit Agricole in France (which follows the STET specification) has 44 distinct regional banks.
- Rendering individual regional banks on a user interface is problematic as, in the Credit Agricole example, this would result in 44 individual bank options.
- In practice this would mean 44 identical icons on a Bank Selection screen (with the PSU having to find his/her specific branch by scrolling though a large list).
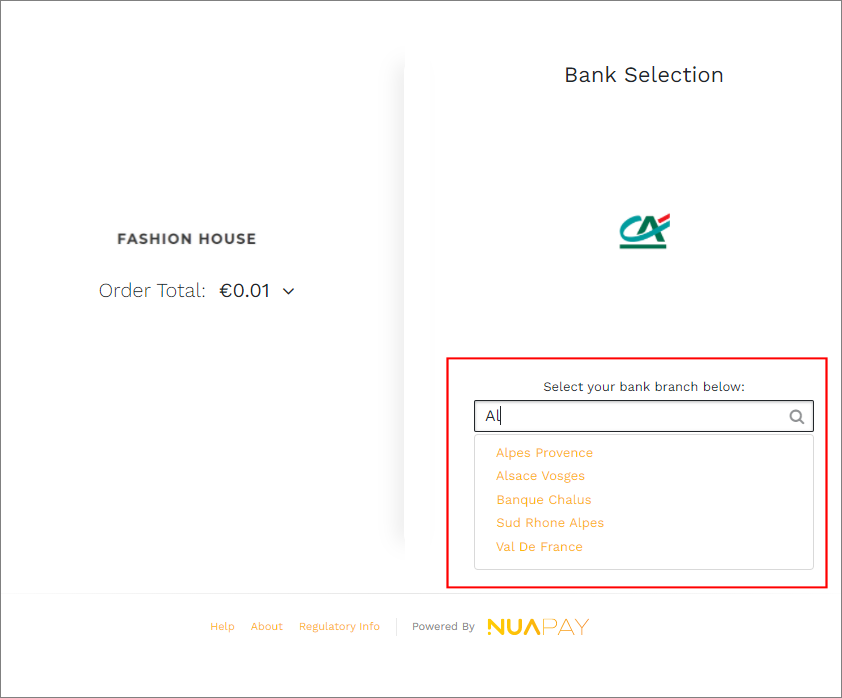
When designing your user interface, we recommend that you use the Retrieve Banks and the View Bank Families endpoints so that when a PSU selects a bank that has a number of regional banks (branches) linked to it, the user is provided with an option to select the required branch.
In REDIRECT mode (i.e. where Nuapay manages the User Interface), the bank/branch selection screens are handled as follows:
- The user selects a bank that has a number of branches linked to it (in the call to Retrieve Banks,
bankfamilyIdis populated for Credit Agricole, for example). - The bank is rendered once, as in the image below and appears like any other bank icon on screen:

- When the PSU selects this bank, a screen allowing the user to select his/her required branch is displayed:
- Once the user selects the required branch (bank family), the payment flow continues as normal.