Overview
Note that the approach and sequence of API calls varies for Merchants (who are accessing the services for themselves) and Partners who are accessing the service on behalf of their merchants.
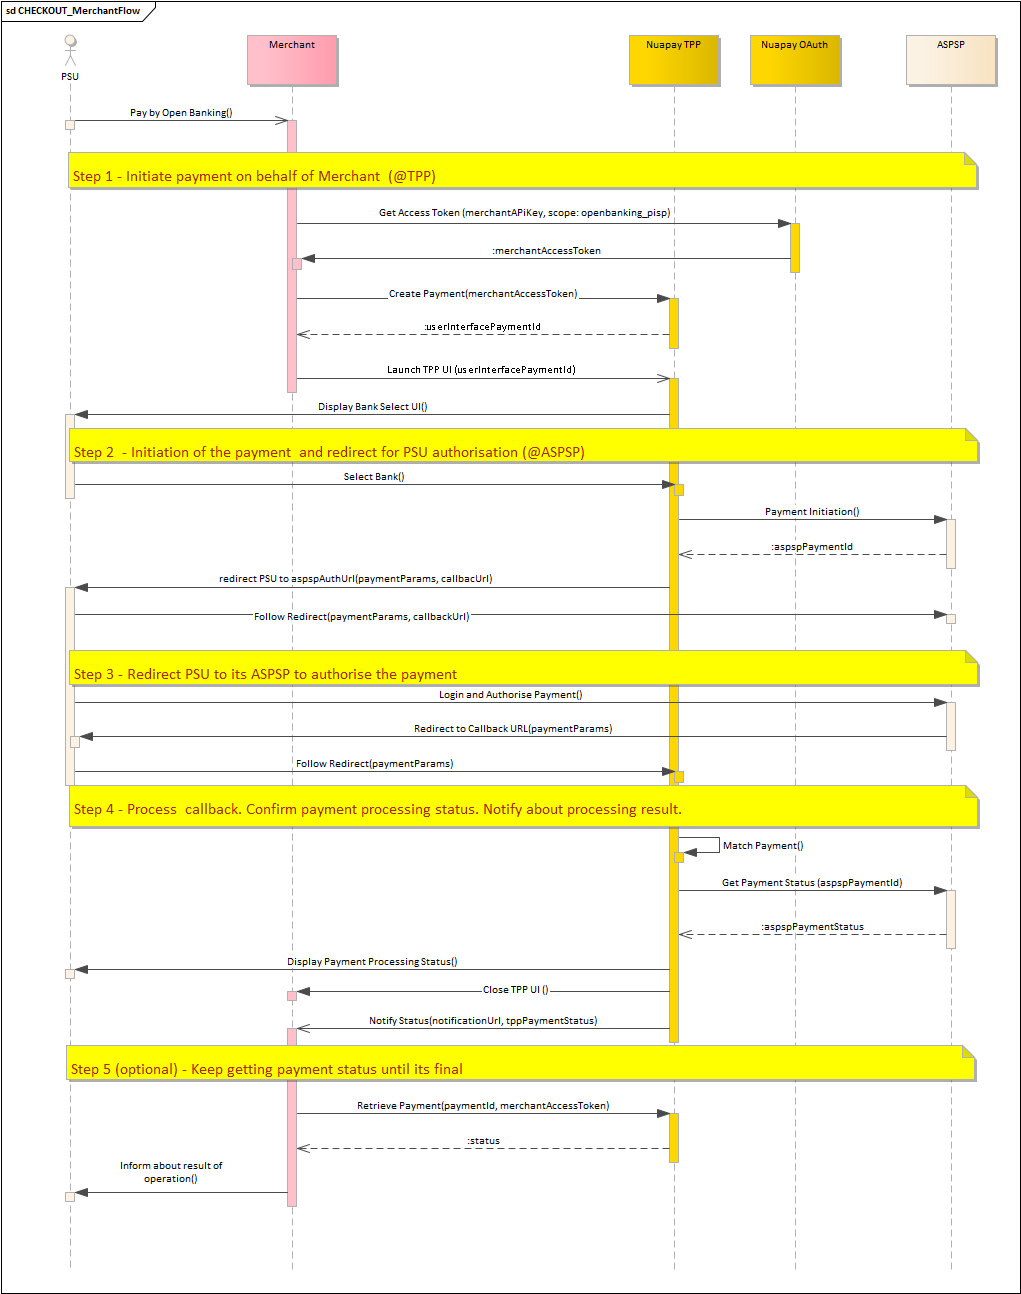
- (Optionally) Use your API key to retrieve a merchant access token. (For more on this see retrieving tokens).
- Call the
/paymentsendpoint, using the OAuth token retrieved in the previous step (or else use your API Key) (see Create Payment) and set theintegrationTypetoCHECKOUT. - Using the returned
userInterfacePaymentIdfrom step 2, call NuapayOpenbanking.showUI(), e.g.,NuapayOpenbanking.showUI('772d0ef5-596b-43de-a6a0-832c9ab7a7a5')to display the bank selection screen to the user. - The PSU selects a bank.
- The Nuapay TPP will then redirect the PSU to the ASPSP to authorise the payment.
- Once finished at the bank, the user is redirected to the Nuapay TPP, where a payment summary screen is displayed.
- When the summary screen is closed (either when the user clicks Close or the pop-up self-closes after 30 seconds), a payment-finished event is passed to the parent window.
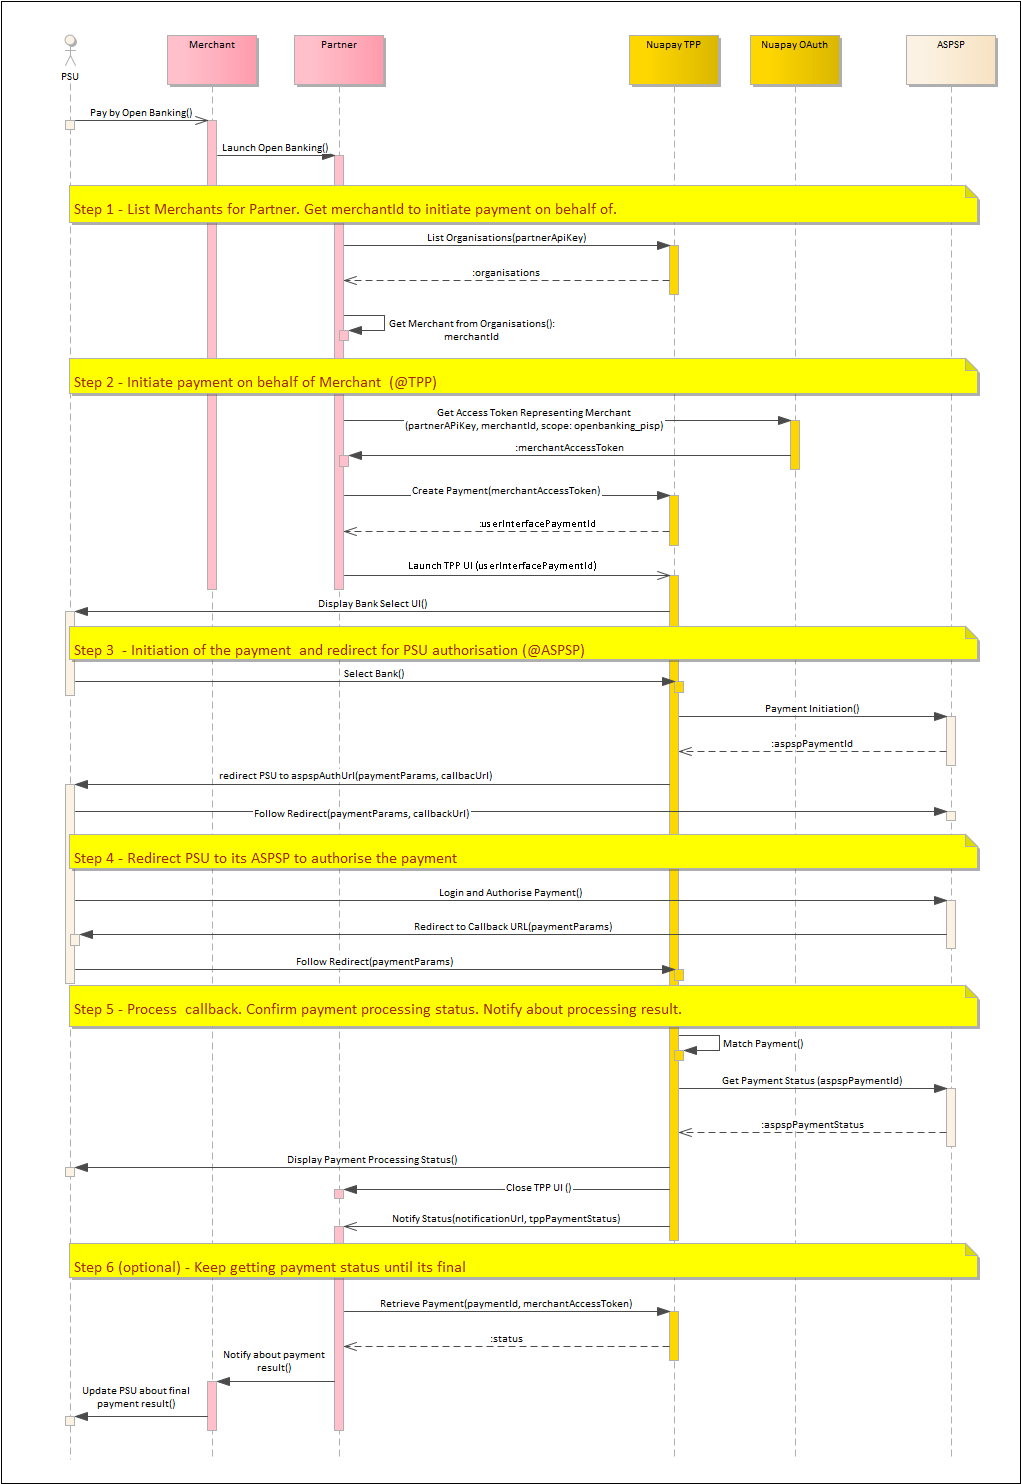
- Use your partner-level API key to retrieve a token representing the required merchant. (For more on this see list organisations and retrieving tokens).
- Call the
/paymentsendpoint on behalf of the merchant, using the OAuth token retrieved in the previous step (see Create Payment) and set theintegrationTypetoCHECKOUT. - Using the returned
userInterfacePaymentIdfrom step 2, call NuapayOpenbanking.showUI(), e.g.,NuapayOpenbanking.showUI('772d0ef5-596b-43de-a6a0-832c9ab7a7a5')to display the bank selection screen to the user. - The PSU selects a bank.
- The Nuapay TPP will then redirect the PSU to the ASPSP to authorise the payment.
- Once finished at the bank, the user is redirected to the Nuapay TPP, where a payment summary screen is displayed.
- When the summary screen is closed (either when the user clicks Close or the pop-up self-closes after 30 seconds), a payment-finished event is passed to the parent window.
Authorisation
An API Key or an OAuth token uniquely identifies you on Nuapay and is required to allow you to use our API services.
For more on API Keys and OAuth, see the API Basics section.
Calling the Payment Endpoint
The Open Banking payment endpoint returns a payment identifier on a successful invocation.
To generate a payment ID:
- Generate a server-to-server call to
/payments. - Ensure that you have referenced your API Key or OAuth token in the request.
- The
/paymentsservice is described in Create Payment. - In the response, you will need to store the
userInterfacePaymentId.
Adding the CSS and JS File References
On your payment page you will need to add the following:
For Sandbox
<script src="https://sandbox.nuapay.com/tpp-ui/js/nuapay-open-banking.js"></script>
<link rel="stylesheet" type="text/css" href="https://sandbox.nuapay.com/tpp-ui/css/nuapay-open-banking.css" />
For Production
<script src="https://api.nuapay.com/tpp-ui/js/nuapay-open-banking.js"></script>
<link rel="stylesheet" type="text/css" href="https://api.nuapay.com/tpp-ui/css/nuapay-open-banking.css" />
Adding The Open Banking Pay Button
At this point you have:
- Added the JS and CSS links to your payment page.
- Retrieved the
userInterfacePaymentId(via the Create Payment service).
To enable the PAY button you will need to add an onclick event. See the example below:
<a class="btn btn-primary" href="#" onclick="NuapayOpenBanking.showUI(‘772d0ef5-596b-43de-a6a0-832c9ab7a7a5’;‘https://sandbox.nuapay.com/tpp-ui/’);">Pay Now</a>
In the NuapayOpenBanking.showUI(id, url) function, the id is the userInterfacePaymentId |
In this example, when the user clicks this button:
- The Select Banks pop-up for the identifier
772d0ef5-596b-43de-a6a0-832c9ab7a7a5is displayed. - The PSU would be directed to the Nuapay TPP (Sandbox) Bank Selection screen located at
https://sandbox.nuapay.com/tpp-ui/.
Note that you will need to specify the correct URL based on whether you are testing or working in Production:
| SANDBOX | https://sandbox.nuapay.com/tpp-ui/ |
| PRODUCTION | https://api.nuapay.com/tpp-ui/ |
onclick event.
Most browsers block pop-ups if they are called outside of user-triggered event handlers like onclick.
Adding a Listener
Once you have successfully added the PAY button to your site you will next need to handle when the pop-up window is closed. In a successful flow:
- The pop-up will be closed by users after they confirm the payment with their bank and are redirected to your confirmation message.
- Users may also choose to cancel out of the flow at any point and close the pop-up window without completing the payment.
To handle the pop-up close event:
- You will need to add a Listener to your parent Payment Page window to listen for the close event.
- For
userInterfacePaymentId=772d0ef5-596b-43de-a6a0-832c9ab7a7a5, this would look like this:
{source: "NUAPAY_OPEN_BANKING", status: "CLOSED", paymentId: "dmq8nexom", userInterfacePaymentId: "772d0ef5-596b-43de-a6a0-832c9ab7a7a5"} |
A Sample Listener is provided below:
<script>

var listener = function(event) {
    if(event.data.status=="CLOSED") {
        var url = "/merchant/status?id=" + event.data.userInterfacePaymentId;
        $.ajax({
          url: url,
          success: function(data){
            if (data.status == "COMPLETE") {
                location.replace("./shoppaid");
            } else {
                location.replace("./shopfailed");
            }
          },
          error: function(){
            location.replace("./error");
          }
        });
    }
}

window.addEventListener("message",listener,false);

</script>
The var url = "/merchant/status?id=" + must be appended with one of the following:
- event.data.userInterfacePaymentId
- event.data.paymentId
The payment identifier (either the userInterfacePaymentId or the paymentId) must be:
- Stored in a session or in a Databases, for example.
- Posted back to your payment page.
To retrieve the payment status:
- (For userInterfacePaymentId): call List Payments and filter on the
userInterfacePaymentId. - (For paymentId): call Retrieve Payment using the
paymentId(associated with theuserInterfacePaymentId).
The End-User Experience
Once configured, your users’ interaction with Open Banking payments will be similar to the following for a Desktop user (for users on mobile devices, the screens vary from the sample presented below):
The PSU (i.e. the end user) will select the required goods or services on your merchant site and:
- Select Nuapay Open Banking as the payment method.
- Click Pay.
- A pop-up window overlayed on the calling payment page is generated. This is rendered through Nuapay’s TPP application:

- If required, the PSU can click the order details icon to expand and view the items making up the order:
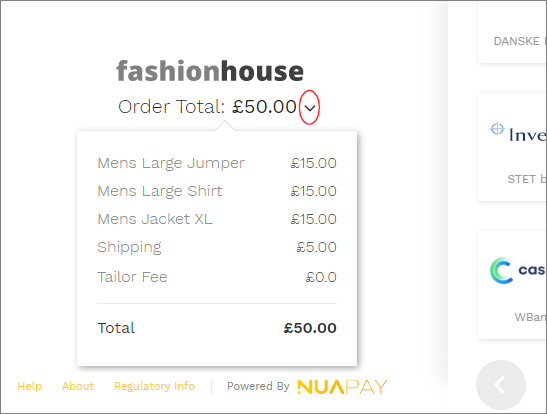
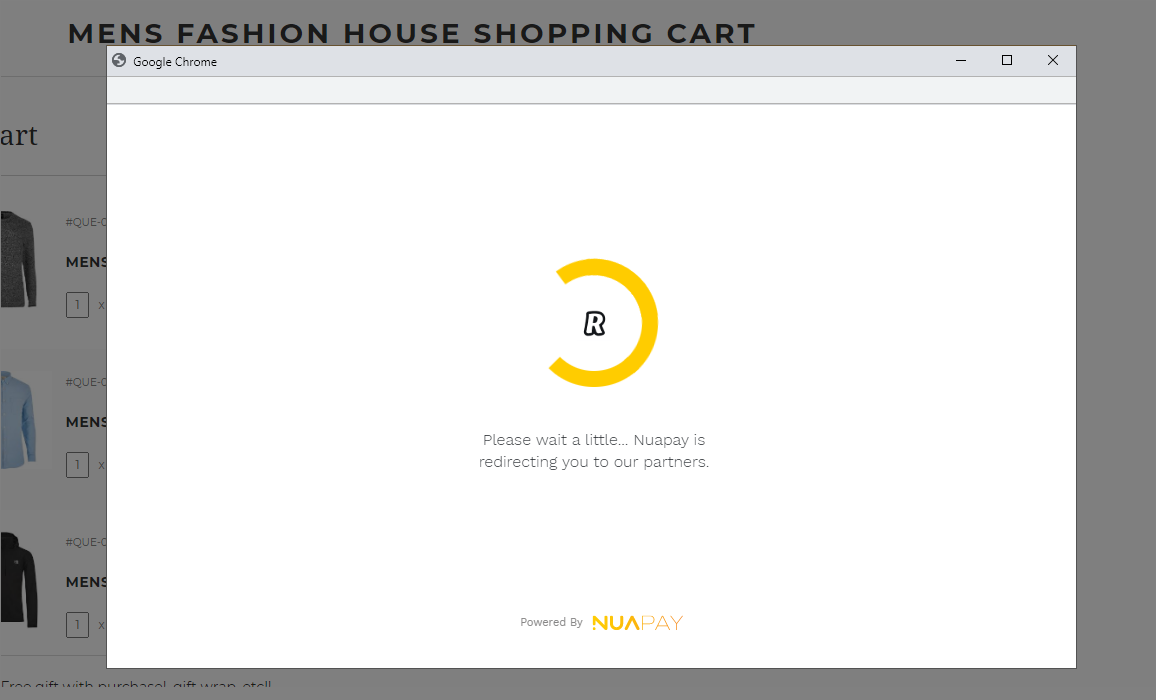
(See theorderDetailsobject on the Create Payment endpoint for more on this). - The user selects the ASPSP in which his/her account is held (Revolut for example) and is redirected to the bank’s logon page (or optionally the PSU selects the bank and clicks Continue, if you have decided to configure a Confirmation page - see the following section for more on this).
- The user then authenticates on to the selected ASPSP (Revolut in this example):
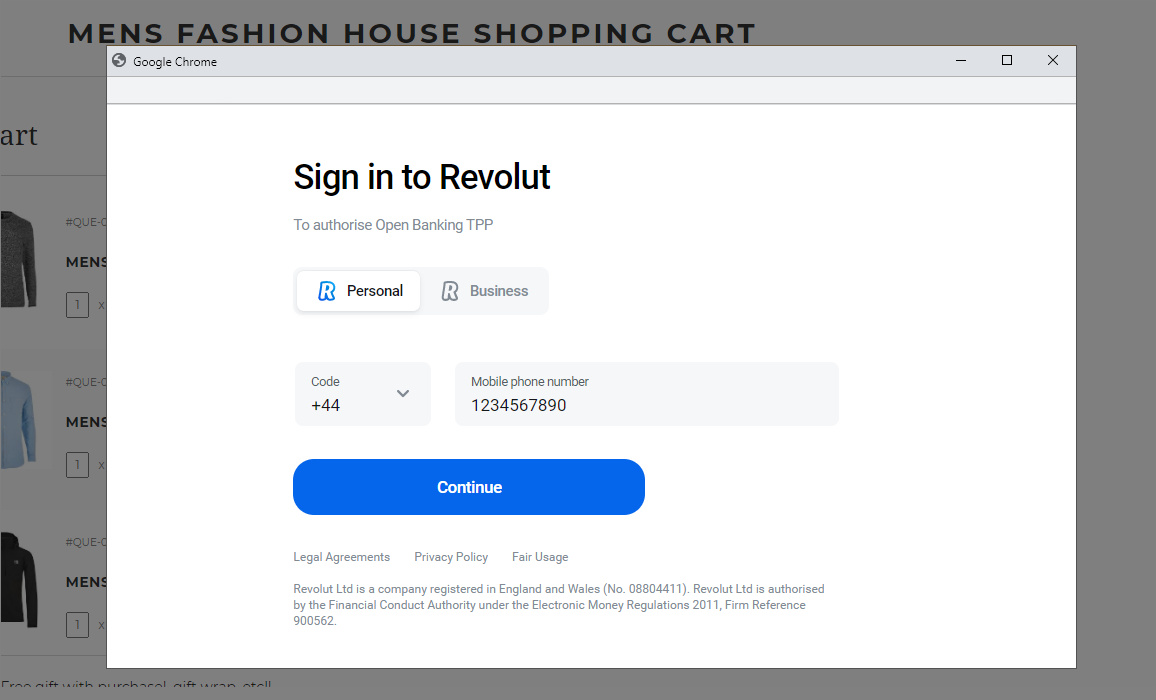
- Once authenticated with the bank, the user can choose to Authorise the payment:
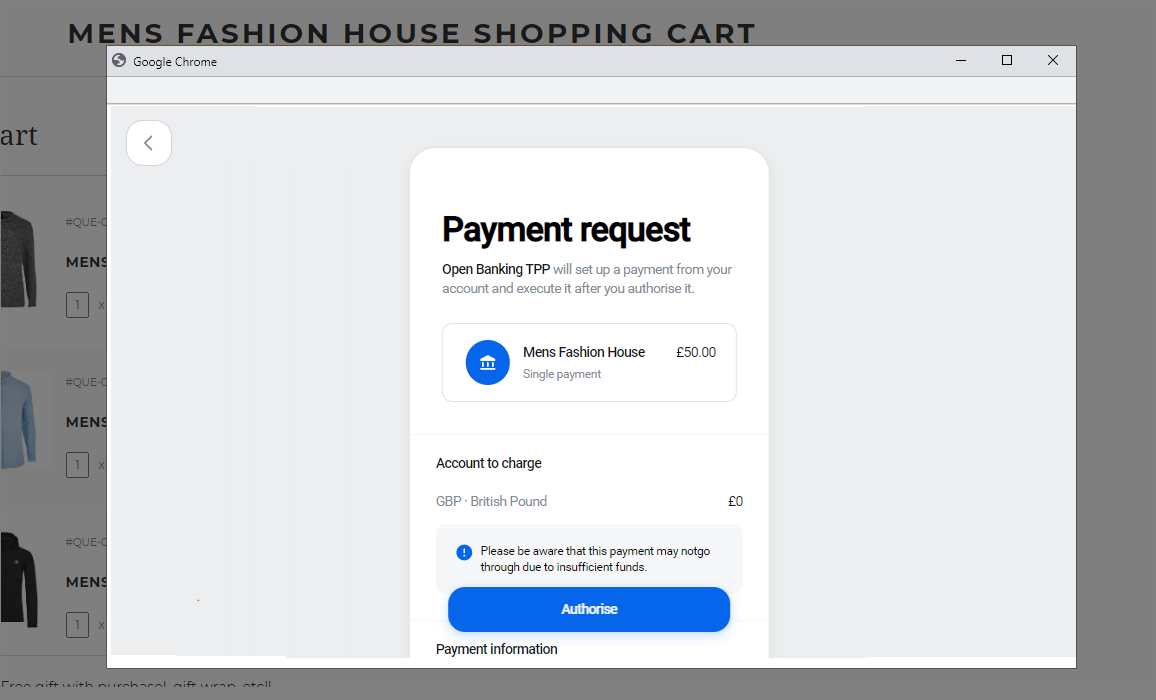
- Once authorised, the PSU is redirected to the Nuapay TPP with a confirmation message:

- The pop-up closes (either the user clicks Close or it closes automatically after 30 seconds) and the user is redirected to the merchant payment page, with a confirmation message.
Managing The Bank Screen
The banks that are listed are determined by the values you pass in your call to the Create Payment (POST /payments) endpoint:
- The
currencydetermines whether EUR-supporting or GBP-supporting banks are displayed. - The
countryCodeallows you to further filter the banks that are listed.
In addition to this:
- Banks are automatically ordered based on popularity for the given region. Where banks are equally ranked, they are ordered alpahbetically.
- If you pass a value for your PSU email address in the
POST /paymentsrequest, and this email has been previously provided in a payment request, the bank that the user previously selected will be displayed as the first option.
Configuring a Confirmation Screen
Some merchants like the Open Banking payment user experience to be as fast as possible:
The PSU:
- Selects the required ASPSP.
- Logs on to his/her bank.
- Authorises the payment and is redirected to a success page.
Friction is limited and the user can completed the payment in seconds.
However in some cases a little friction isn’t all bad! Especially where users may be new to the payment method, it can be good to slow things down a little. With this in mind, rather than provide only the 3 steps above, you can configure the flow to have an additional confirmation page.
With this additional page added:
- PSUs select the required ASPSP.
- The selected bank details are then displayed on a confirmation screen:
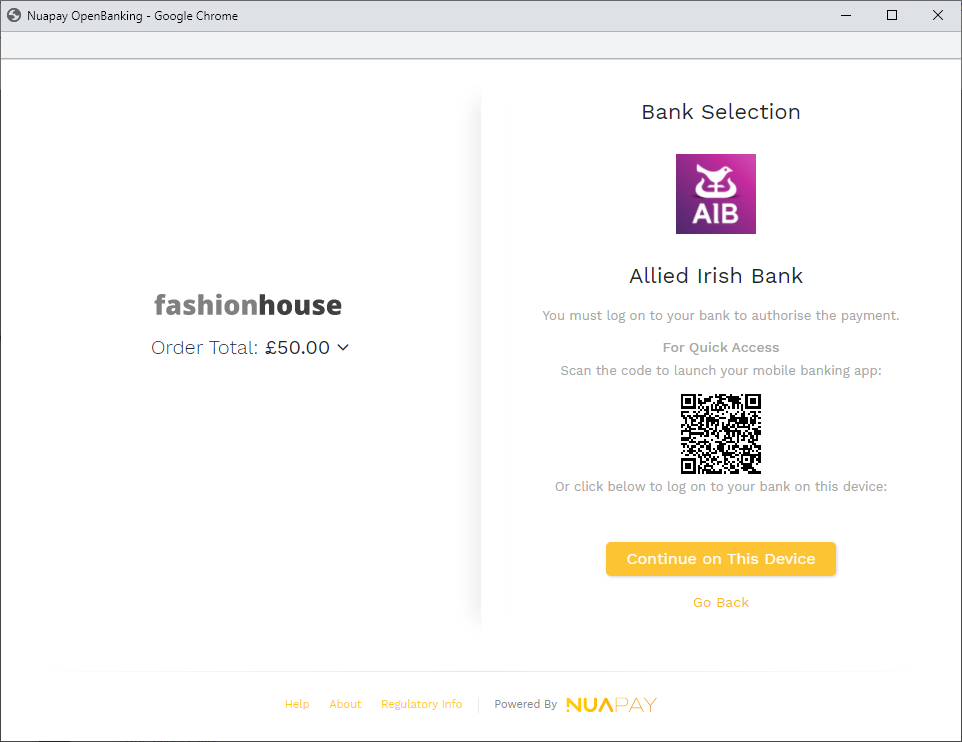
- Users are informed that they must log on to their bank.
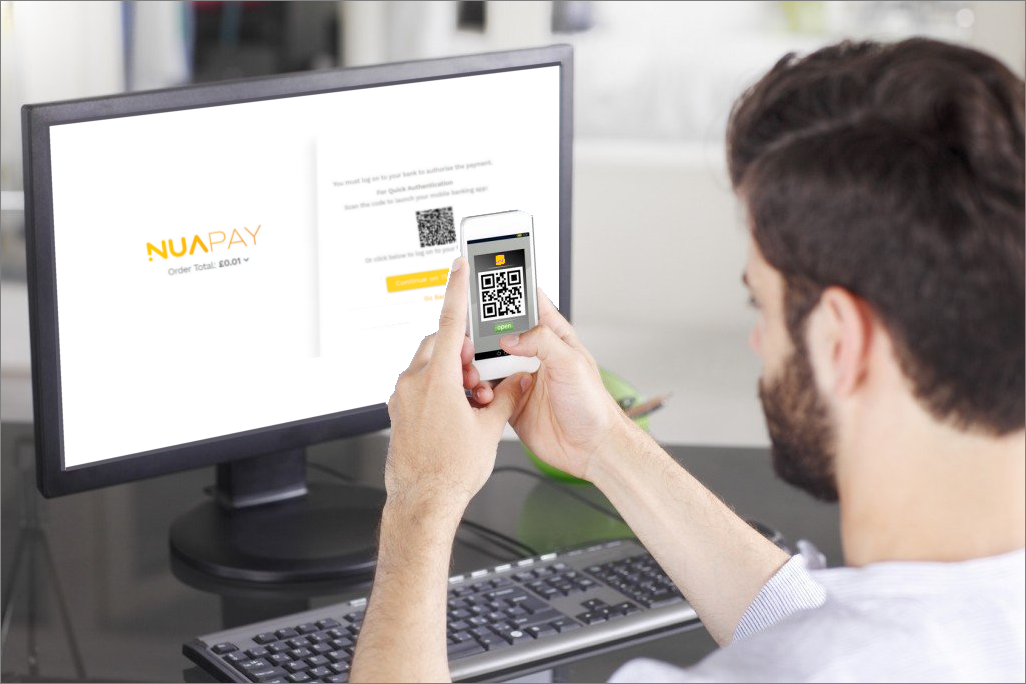
- A QR Code is also presented; users may:
- Scan the code to complete the bank authentication and payment authorisation steps on a mobile device (see the following section for more on this).
- Click Continue on this Device to complete the payment on the desktop.
- Click Go Back to choose a different bank.
Prompting for PSU Details Upfront
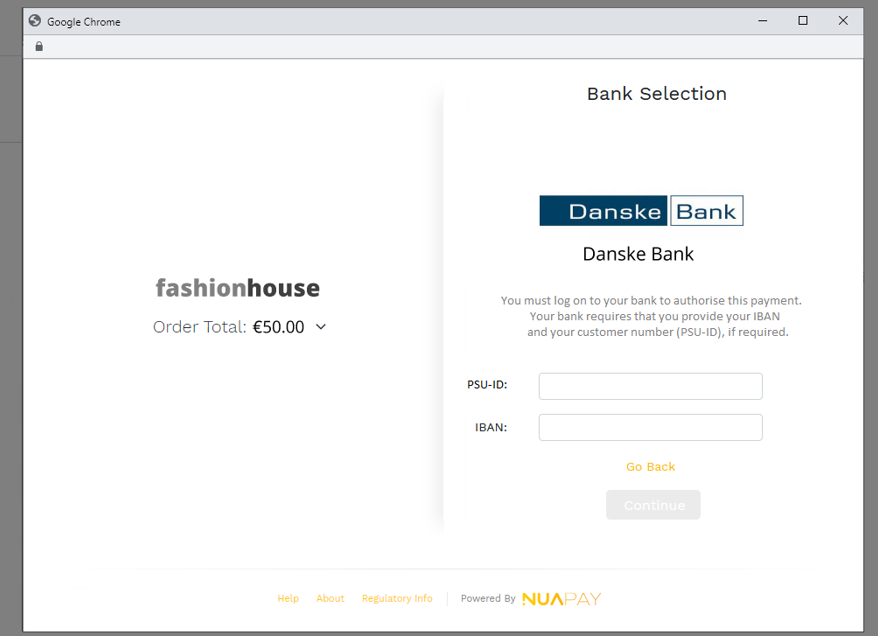
For ASPSPs that have implemented the Berlin Group specification, before being redirected to their bank, users are required to provide their:
- PSU-ID (which is their unique identifier with their bank).
And/OR
- IBAN.
Note that:
- When a PSU selects an ASPSP that has a
psuId= required (see more about bank metadata on View Bank) then the Payment Confirmation screen is always displayed (even if the merchant configuration is set to not display the confirmation page). - If the selected bank’s
debtorAccountRequiredistruethen similarly, the PSU will be prompted to provide his/her IBAN. - Once a valid PSU-ID and/or IBAN are provided the QR code is rendered and the Continue button is enabled.
Configuring the Refund Alert
When using a Nuapay account as the creditor account for your Open Banking payments, your payers’ account details are retrieved as part of the payment processing. If in future you want to refund the payer, you can call the Refund Payment endpoint.
If you are not using a Nuapay account, it is still possible to make a refund
In the OBIE specification (v3.1.6):
- It is possible to retrieve the PSU’s account details when making a PISP payment for the purposes of making a refund payment later (if required).
- The OBIE scheme suggests that the PSU should be informed that the TPP will be retrieving these account details (as per the GDPR) and we allow for an alert text to be displayed on the user interface (for CHECKOUT and REDIRECT implementations). In this release we have added a configuration to allow partners/merchants to decide on whether or not to display this detail to the PSU. Options are: • Read Refund Account – YES/NO • Default = NO This configuration may be made at the: • Partner level OR • Merchant level. If configured at both levels, the merchant-level configuration takes precedence.
QR Code Functionality
Why a QR Code?
- When working on a desktop and accessing online banking, it can be tedious for users to authenticate themselves.
- Typically banks will issue a unique code and then request a password or specific characters from that password.
- To avoid this, it is possible for PSUs to use a mobile device for both the authentication and payment approval steps: users scan the QR code on their device to launch their mobile banking app.
- Using a mobile device allows users to take advantage of biometric authentication: so instead of having to type codes and passwords, face recognition or a fingerprint scan is all that is required.
The QR code will only be displayed where:
- The Confirmation Page has been enabled.
- The PSU is accessing the service on a desktop device (the QR Code is not displayed on other devices).
To use the feature:
- The PSU selects to pay via Open Banking and selects a bank.
- The confirmation screen is displayed with a QR Code.
- The user scans the code:
- The user’s online banking app is launched (via Mobile Deep Linking), where the user has a mobile banking app installed on his/her device.
- The desktop displays an In-Progress overlay while the user completes the authentication and authorisation on the mobile device.
- Once the payment is authorised on the mobile device, the PSU is automatically logged out of the ASPSP on the mobile device and the Success page is displayed on the desktop.
Launching the PSU’s Mobile App
When using a mobile device to complete the Open Banking payment, note that not every user’s experience will be the same. Ideally you would like your payers to be directed to their online banking application once they scan the QR code but this may not always be the case; some mobile devices are configured to always open links in the device’s Web browser and this may not always give your end users the best user experience.
Note that:
- For the bank application to open by default to authorize an OB payment the user must have the bank application installed on their handset and they must have logged in to their bank using the app at least once before attempting to authorize the OB payment.
- When receiving the first authorization URI on the handset, the user should be prompted to select a “default action” when receiving a deep link. This can be “Open in browser” or “Open in App” .
- This decision can be made only once and the user choice will be the default behaviour in future.
A note on browsers:
- Some browsers have default actions set at install time.
- For example by default, the Samsung Internet app will open the PSU’s bank page in the browser. This is a Samsung internet browser setting.
- To change this default setting, open Samsung Internet:
- Go to Settings > Useful Features and select the slider Open links in other apps (note the description of this useful feature : Open Links in a related app instead of Samsung Internet).
- Once a PSU does this, the bank app will be launched by default, rather than the browser.
- Similarly in the Firefox browser, the PSU’s bank page is opened in the browser by default.
- To change this default setting:
- Open Firefox.
- Go to Settings > Advanced > Add-ons and select the slider Open links in apps.
- Once the PSU does this, the user’s bank app will be launched, rather than the bank’s Web page on the browser.